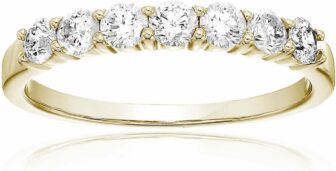
Revive Your Gold Wedding Ring: A Heartfelt Journey
Did you know that over 80% of gold jewelry can lose its luster over time? It’s true! Your precious wedding ring deserves to shine as brightly as the love it symbolizes. This step-by-step guide will help you restore your ring’s beauty, bringing back its stunning brilliance with simple care and techniques. Let’s embark on this heartfelt journey together!
What You Need to Get Started
To revive your gold wedding ring, gather the following items:
With these supplies on hand, you’re all set to restore your ring’s shine!
Step 1: Gather Your Supplies
Before You Dive In, Check Your Arsenal!Collect everything you need before diving into the cleaning process. Having all your materials within reach will streamline your efforts and keep you focused.
Here’s what you’ll need:
Imagine just before your anniversary, your ring gleams as you slip it back on! Following this first step prepares you for a successful cleaning. Grab these supplies, and let’s move on!
Step 2: Soak Your Ring
Why Letting It Soak Works Wonders!Fill a small bowl with warm water and add a few drops of mild dish soap. Stir gently to mix the soap evenly into the water.
Now, take your wedding ring and carefully immerse it in the soapy solution. Allow it to soak for about 15-20 minutes. This soaking period is crucial, as it loosens dirt and grime that may have built up over time, making the next cleaning steps far more effective.
Picture this: with every minute your ring sits in the soapy bath, it’s gently releasing the particles that cloud its brilliance. Take a moment to visualize your ring emerging from this soak, gleaming with renewed vitality. So, let it relax in the warm water and prepare for a sparkling cleaning adventure ahead!
Step 3: Gently Brush Away Grime
Brush Your Ring Back to Life—It’s Easier Than You Think!Take your soft-bristle toothbrush and dip it into the soapy solution where your ring has been soaking. With a light touch, begin to gently scrub the ring. Focus your attention on the intricate details and crevices where dirt often gathers.
Remember: The goal here is to remove stubborn grime without scratching the gold. Use circular motions and avoid applying too much pressure. It’s similar to giving your ring a gentle massage, allowing it to loosen trapped dirt while preserving its delicate surface.
If you notice any particularly stubborn areas, carefully spend a bit more time scrubbing those spots. Picture transforming your ring from dull to dazzling with each stroke. This step is key to restoring your ring’s original luster, so take your time and enjoy the process!
Step 4: Rinse and Dry
The Simple Rinse That Makes All the Difference!Now that your ring has soaked and been scrubbed to perfection, it’s time to rinse away the soap and any loosened debris. Hold your ring under warm running water, allowing the water to wash over it thoroughly. This crucial step will ensure that no soap residue remains, which could dull your ring’s shine.
Next, gently dry your ring with a soft, lint-free cloth. Avoid using normal towels that may leave fibers or scratches on the surface. Think of this as cradling your ring in a warm embrace, treating it with care as you dry it off completely.
Picture how radiant your ring will look after this careful rinse and dry process. With every drop removed, your ring is one step closer to its glorious shine!
Step 5: Polish for Extra Shine
Unlock the Secret to That Dazzling Finish!Now that your ring is clean and dry, it’s time to add that final touch! Grab a jewelry polishing cloth designed specifically for gold. This soft cloth will work wonders in restoring the brilliance that makes your ring truly sparkle.
Buff your ring gently by moving the cloth in circular motions over the surface. As you polish, notice how the cloth brings out the luster, reminiscent of the day you first slipped it on your finger. Take your time during this step, focusing on every detail, and give special attention to any areas that need extra care.
Once you’re finished polishing, admire your handiwork! Your wedding ring should now shine like new, ready to be worn proudly for all the years to come. Shine on!
Step 6: Store Your Ring Safely
Protecting Your Precious Investment—It Matters!Now that your ring looks fabulous, it’s crucial to store it properly. Safeguard your revitalized treasure from future tarnishing and scratches. Choose a soft pouch or a dedicated compartment in your jewelry box, ensuring that your ring is cushioned and protected.
Follow these tips:
Treat your ring like the precious piece it is! Safe storage means it’ll be ready to shine whenever you are.
Celebrate Your Revived Ring!
Reviving your gold wedding ring is a rewarding task that enhances its beauty and sentimental value. With these simple steps, you can enjoy wearing your ring every day, just like when you first said “I do.” Give it a try, share your results, and keep the love shining!
