Unlock the Perfect Fit: A DIY Wedding Band Resizing Guide
Did your wedding band become too loose or tight? Don’t worry! You can resize your ring at home in just six easy steps. This guide will equip you with the practical tips and tools needed for a snug fit—no jeweler required!
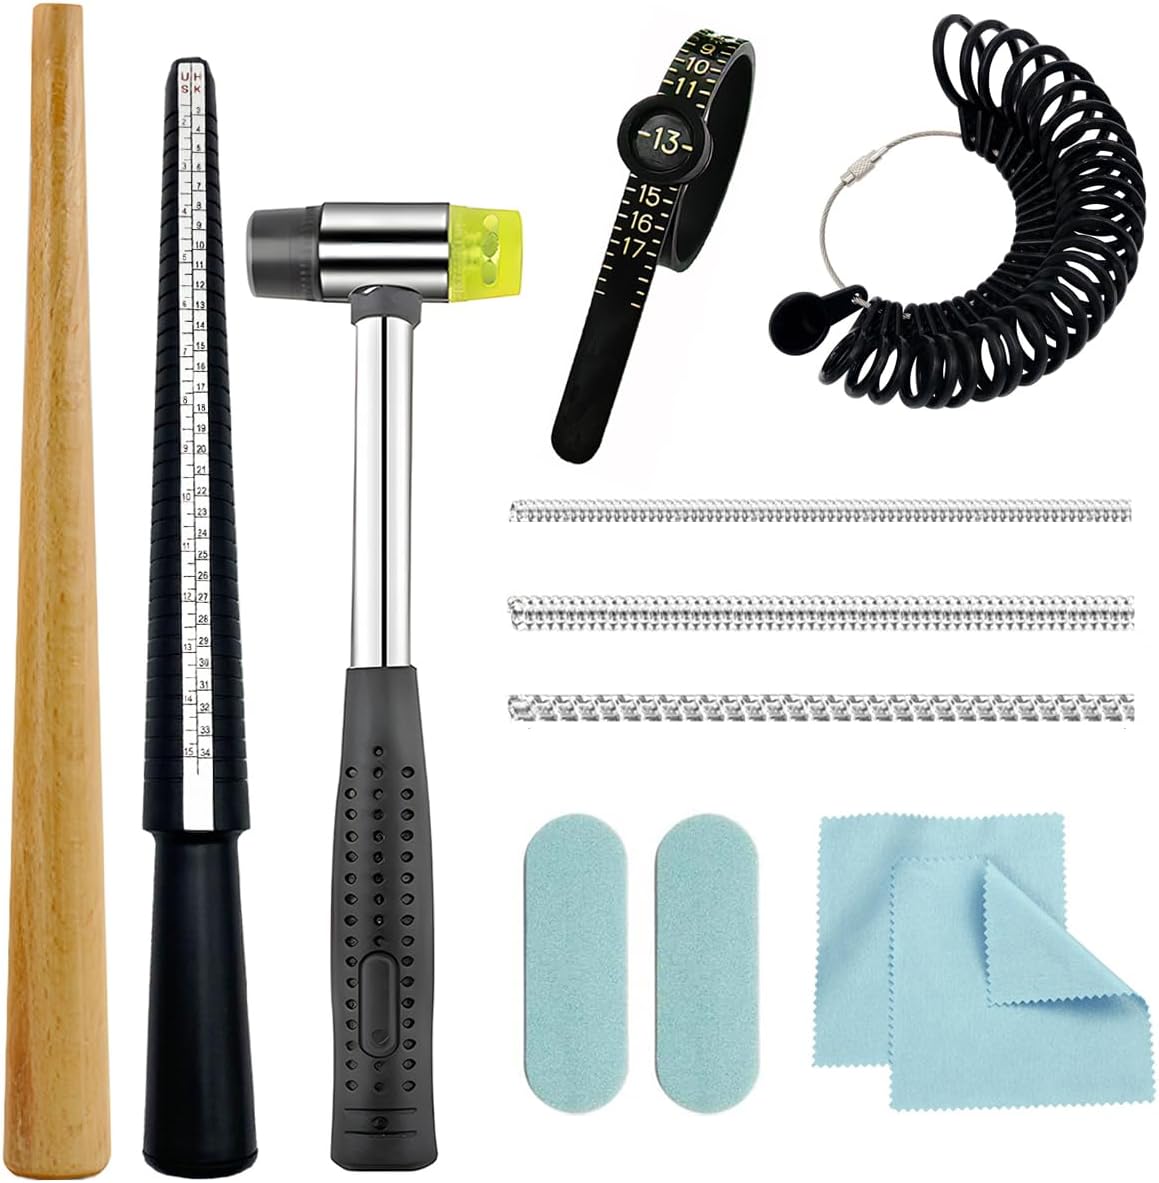
What You’ll Need for Success
And of course, don’t forget to bring your patience and a steady hand!

Step 1: Measure Your Current Ring Size
Are You Wearing the Right Size? Let’s Find Out!Start by measuring your current ring size accurately. This step is crucial to ensure you resize correctly. Use a ring sizer or a piece of string to get the right measurement.
- Ring Sizer: If you have access to a ring sizer, slide it onto your finger until it feels snug but not tight. Note the size indicated.
- String Method: Wrap a piece of string around the base of your finger, marking where it overlaps. Measure the length of the string with a ruler in millimeters.
- Consult a ring size chart online to convert the measurement to the corresponding ring size.
Remember to measure your finger size at different times during the day, as your fingers can swell with warmth. This will ensure the best fit!

Step 2: Determine How Much to Resize
Too Loose or Too Tight? Find Your Sweet Spot!Evaluate how much you need to resize your band. Grab a few rings that fit your fingers well. Try them on and see if they feel comfortable. This will give you a solid feel for how much you might need to adjust your wedding band.
Next, use a sizing chart. Lay your band against a ruler or a printable ring size guide. Check where it sits—this should indicate whether you need to go up or down a size.
For example, if you’re between a size 7 and 8 and your band feels too tight, you may want to resize to an 8. If it’s loose, aim for a 7.
Taking these steps will guide your next moves, ensuring you have the right fit in mind before you proceed!

Step 3: Prepare Your Band for Resizing
Ready, Set, Prep! It’s Time to Get Serious!Before you begin the resizing process, clean your ring thoroughly. A clean ring allows you to spot any imperfections that could affect the resizing outcome. Plus, it ensures the process is smooth and even. Remember, a clean ring is a happy ring!
- Use soap and water: Mix a few drops of mild dish soap in warm water. Soak your wedding band for a few minutes.
- Gently scrub: Take a soft toothbrush or cloth and gently scrub the ring, focusing on crevices where dirt or grime may accumulate.
- Rinse and dry: Rinse the band under lukewarm water and dry it with a soft, lint-free cloth.
Ensuring your ring is clean not only prepares it for resizing but also gives you a chance to appreciate its beauty before you start the DIY process!

Step 4: Resize Your Wedding Band with Care
The Moment of Truth: Make Your Ring Fit Like a Dream!Now comes the exciting part! Depending on whether you’re making the band smaller or larger, follow the appropriate method carefully.
Take your time to avoid mistakes. Remember, patience is key; rushing can lead to a less-than-perfect fit!

Step 5: Test the Fit
Is It Perfect Yet? Let’s Find Out!Try on your resized ring. After completing the resizing, slip your wedding band back onto your finger. Wear it for a while—maybe while doing chores or just relaxing on the couch. Pay attention to how it feels.
Look for signs of discomfort: Is it too tight or loose? A snug fit without pinching is ideal. If it slides around too easily, it may be too loose.
Make adjustments as needed. If the fit isn’t perfect, don’t worry! You can tweak it again. It’s crucial for a piece that holds so much meaning to feel just right. Your wedding band should be as comfortable as it is beautiful; after all, you’ll want to cherish wearing it every day!

Step 6: Final Touches and Care
Finish Strong: Your Ring Deserves the Best!Once you’re satisfied with the fit, give your ring a final polish to bring back its shine. Use a soft, dry cloth to buff the surface gently. This will enhance the metal’s luster and make it look brand new!
Next, check for any rough edges. If you feel any jagged spots, carefully file them down using a fine file or emery board. This ensures it’s comfortable and won’t snag on clothing.
Lastly, clean your wedding band regularly to maintain its beauty. Use the soap and water method previously mentioned each month, and consider storing it in a soft cloth pouch to prevent scratches.
Proper care will keep your wedding band looking beautiful for years to come, just like your love!

Celebrate Your Success!
Congratulations! You’ve resized your wedding band at home, saving time and money while adding a personal touch. Wear it with pride, knowing you did it yourself! So why not give it a try, and share your results with friends and family?