Unlock the Sparkle of Your Wedding Band
Bring back the timeless shine of your gold wedding band with easy home methods. You deserve to see its brilliance every day, and it’s simple to achieve!
What You Need to Get Started
Gather Your Cleaning Supplies
Don’t Start Without These Must-Haves!Before you dive in, you’ll need a few items that are already probably in your home. Let’s explore what you need to get that ring glistening!
- Mild Dish Soap: Grab a gentle soap without harsh chemicals. It’s effective yet safe for your ring’s gold finish. Think about the kind you might use for washing delicate dishes!
- Warm Water: Use lukewarm water—not hot or cold. Warm water helps dissolve the soap quickly and effectively loosens dirt.
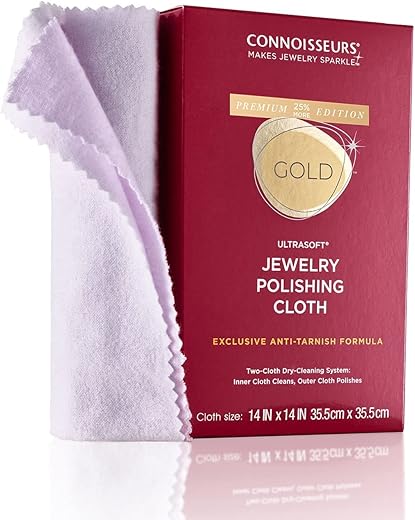
- Soft Cloth or Microfiber Towel: You’ll want something soft to avoid scratches. A good microfiber cloth works wonders, as it’s gentle and absorbent.
- Soft-Bristled Toothbrush: Opt for an old toothbrush you no longer use. This will be your gentle scrubbing tool that reaches all the tiny crevices without damaging the gold.
- Small Bowl: Find a bowl where you can immerse the ring comfortably. A shallow dish works well and helps you keep your area clean.
Gather these supplies, and you’re well on your way to restoring your wedding band’s shine!

Create Your Cleaning Solution
The Secret Sauce for a Dazzling Shine!You might be surprised at how easy it is to whip up a cleaning solution that’s gentle yet effective. Let’s mix it up!
Combine Ingredients: Take your small bowl and fill it with about one cup of lukewarm water. Now, add a few drops (2-3 is ideal) of mild dish soap. Remember, you’re looking for a solution that cleans without harsh chemicals—just like how you’d treat your delicate wine glasses!
Mix It Up: Use a soft cloth or your fingers to stir the solution gently. Watch as the soap combines with the water, creating a bubbly mix that will do wonders for your ring. Don’t overdo it; you want a light froth without too many bubbles.
Test It: Before plunging your ring into the solution, consider testing it on a small, inconspicuous area. If your band has intricate designs, ensure the mixture doesn’t cause any discoloration or damage.
Now that you’ve got your cleaning solution ready, you’re just a step away from giving your gold wedding band the care it deserves!
Soak Your Ring Like a Pro
Patience Pays Off – Just Like Your Love!Now that you have your cleaning solution, it’s time to let your wedding band soak. Soaking is a game changer! This step not only loosens grime but also ensures a deeper clean.
- Immerse Your Ring: Carefully place your gold wedding band in the bowl with your warm, soapy solution. Submerge it completely, but be gentle. You want it to float freely without getting stuck.
- Set a Timer: Allow the ring to soak for about 15-20 minutes. During this time, the soap will work its magic, breaking down dirt and oils that have built up over time. Think of it as a mini spa day for your ring!
- Keep an Eye Out: While your ring is soaking, resist the urge to stir or agitate the water too much. The key here is patience. Let the solution do the hard work.
- Visualize the Transformation: Imagine how your ring will look after this soak! This quiet moment can spark memories of your wedding day, making the cleaning process more meaningful.
Once your timer goes off, you’re ready for the next step!
Gently Scrub for Perfection
Rub Away the Years – But Not the Love!Now comes the fun part! It’s time to give your wedding band a gentle scrub, ensuring you keep it safe while restoring its brilliance.
- Grab Your Toothbrush: Take that soft-bristled toothbrush you set aside. It’s your secret weapon for tackling dirt without scratching the gold.
- Start Scrubbing: Dip the toothbrush into your soapy solution. Lightly scrub the ring using circular motions rather than back-and-forth strokes. Focus on crevices and intricate designs—these areas often hide grime!
- Be Gentle: Remember, gold is soft, so you don’t need to apply much pressure. Imagine you’re caressing your ring rather than scrubbing it vigorously! A light touch goes a long way.
- Notice the Shine: As you scrub, keep an eye on the transformation. You’ll likely see dirt lifting off. If you come across stubborn spots, give them a little extra love but without overdoing it.
- Rinse as You Go: If you notice the brush getting dirty, rinse it off in the solution, then continue scrubbing. This step helps prevent redistributing grime back onto your ring.
With your careful scrubbing, you’re well on your way to uncovering the ring’s hidden sparkle!

Rinse and Dry Like a Champion
The Final Touches for a Brilliant Finish!You’re almost there! Rinsing and drying properly is crucial for that final sparkle. Let’s wrap this up so your ring shines perfectly!
- Rinse Under Running Water: Grab your ring and hold it gently under warm running water. Ensure you have the drain covered or use a bowl to catch it just in case! This step will wash away any remaining soap or dirt.
- Inspect for Residue: As you rinse, take a moment to check for any soapy residue hiding in the crevices. If you spot any, give it a quick rub with your fingers. Feel free to re-soak if needed; no one likes a dull finish!
- Pat Dry with a Soft Cloth: Once rinsed, reach for that soft cloth again. Rather than rubbing, gently pat your ring dry. This helps avoid scratches while ensuring you remove any moisture. Think of it as wrapping your ring in a fluffy towel after a nice bath!
- Buff to a Shine: For an extra bit of sparkle, give your ring a light buff with the dry cloth. This step can make all the difference, adding a radiant glow.
In no time, you’ll see the glimmer of your beautifully cleaned wedding band!
Enjoy Your Resplendent Ring!
Now that your gold wedding band is shining brightly, wear it with pride and cherish the memories it holds. Try this method and share your results—your ring deserves to sparkle!